on
Infrastructure as Code
This blog post is the second part of a three-part series adapted from a GitOps webinar series which we co-produced together with our friends at VSHN.
In this second part, we will look into a topic that is crucial to any modern cloud-native environment to provide stability and parity across environments: Infrastructure as Code. We will delve into some interesting tools in that realm and compare different concepts and configurations around how to deploy and maintain infrastructure in a sane way. After reading the blog post, you will have a good understanding of IaC and its benefits, and you’ll have a mature tool set available to implement it in your team.
If you have questions, feel free to post them as comments on this blog post. If you would rather sit back and enjoy this part as a webinar, then you may head over to the recording on YouTube.
Introduction
Before we dive into some technical solutions and frameworks for Infrastructure as Code, let’s first examine what we mean by that term.
What is not Infrastructure as Code?
Or actually, let’s start off by looking at what we would not call Infrastructure as Code. While certainly being wonderful in their own right, we would not consider as Infrastructure as Code tools like Ansible, Puppet and Chef which allow you to apply configurations to existing VMs. This is because these tools generally do not take care of the VM or resource creation step itself which, as you will see later, we consider an important part of Infrastructure as Code. That said, tools for VM configuration certainly have their place in DevOps, as we will also see when we have a closer look at Packer.
Furthermore, we would also not consider imperative scripts which create VMs (and possibly install things on them) as Infrastructure as Code. This is because we consider declarativeness as an essential feature of Infrastructure as Code, as you will also see later.
What is Infrastructure as Code?
resource "vm_instance" "my_vm" {
    name = "My VM"
    instance_type = "x-large"
    availability_zone = var.availability_zone
    security_group_ids = [security_group.my_sg.id]

    tags = {
        Name = "IaC-managed VM Instance"
    }
}
So, what is Infrastructure as Code, then? Similar to source code which, when unchanged, produces the same binary every time it is compiled, Infrastructure as Code mandates that the same model, given as code in a textual format, always generate the same environment. Furthermore, it generates the environment automatically without the need for manual configuration or installation steps.
Above you can see an example of a VM described declaratively, in this case in Terraform syntax. You will learn more about Terraform in this blog post. You can see that we specify a name and a type for the VM. Furthermore, we also state the availability zone in which this VM shall be created and a security group to which it will belong. The latter two parameters are not hard-coded in this particular declaration, but instead they are referencing other resources in the environment declaration. In the case of the availability zone, we are referencing a variable declared elsewhere, and in the case of the security group, we are referencing a security group declaration made as a separate resource.
Having the possibility to reference resource definitions and their properties in other declarations is a crucial aspect of an Infrastructure as Code solution, as it enables us to modularize our environment declarations and avoid repeating ourselves when building variations of our environment.
… and why?
So, why would you want to have Infrastructure as Code? Here are the most important reasons:
Prevent environment drift
The first reason is that it prevents environment drift. If you have environments which are automatically generated from code, no one should be able to introduce undocumented changes to a particular environment by manually making configurations on some VM or some virtual network, for example. This means that your applications will not break when transitioning from say the test environment to production for example because there are some infrastructure tweaks which were only taken on test but not on production.
Prevent snowflakes
The second reason is that Infrastructure as Code prevents snowflakes. By snowflakes, we mean infrastructure configurations which have evolved in a non-transparent and often undocumented way, along with some deployed applications. It is usually impossible to recreate the same configuration on new infrastructure without repeated trial and error, essentially replaying the evolution of the initial system. Having your infrastructure generated from code will ensure that the evolution of your infrastructure will stay documented and that fresh rollouts will contain all changes introduced as part of this evolution.
Versionable
The third reason is that Infrastructure as Code enables you to version your environment declaration in a version control system like Git, which we covered in the first post of this series. This has the advantage that you may use standard features of version control to manage your infrastructure. You can use the commit history to find out when and why a particular infrastructure change was made. Furthermore, you can use diff to compare two states of your infrastructure. You can use merge requests to implement review and approval workflows for infrastructure changes.
Reproducible and reusable
The fourth reason is that Infrastructure as Code gives you a reproducible and deterministic way to spin up as many instances of your environment as you require. This obviously gives you more flexibility and makes people feel more confident when making changes.
Documented
The fifth reason is that by writing declarative infrastructure code, you automatically document the created environments. By automatically applying this documentation, we know that it is always up-to-date and gives us an easily readable description of everything that we have deployed.
Principles
So now that we know what Infrastructure as Code is, let’s dive a little deeper into some of the guiding principles which make it work. These principles allow for our source code to be the only source of truth and for us to get the maximum benefit out of Infrastructure as Code.
Imperative versus Declarative
The first important principle of Infrastructure as Code is being declarative. But what do we mean by that?
When communicating with systems or machines, it is intuitive to procedurally describe the operations which we need to perform to get from one state to another. This is what we call the imperative style. When doing so, you are saying things like “First create a new VPC. Then create a new VM. Then create a new Kubernetes cluster. Then install Linux on the VM and so on.”
$ cli create vpc

$ cli create vm ...

$ cli create k8s
The opposite of imperative is declarative. A declarative representation of your infrastructure describes a desired state which you want your environment to be in. A declarative representation says things like “There is a VPC, there is a VM and there is a Kubernetes cluster.”. It does not say which steps need to be undertaken to get from the current state of your environment to this new desired state.
resource vpc {
...
}
resource vm {
...
}
resource k8s {
...
}
So, why do we prefer a declarative style over the imperative one when automating infrastructure? If we think more deeply about our imperative example, we see that there are many cases which our script needs to catch to function correctly. What if a VM with the same name already exists? Do we stop? Do we do something to the existing VM? Or what if the creation of the VM takes a long time? What happens if the script fails halfway through? Can we just run it again? All of this reasoning about special cases, potential failure and long-running asynchronous operations is abstracted away, if you use a declarative style. In the declarative style, you just describe a desired state and leave it to your Infrastructure as Code technology to figure out the steps required to get to that state.
This makes declarative representations of infrastructure a lot cleaner and easier to reason about for operators. Another advantage of declarative representation is that it is always clear what the desired state is, even in a case where the state of your infrastructure changes due to a failure of one or more components. In such a case, an Infrastructure as Code technology will use this representation to bring your environment back to the desired state.
Declarative representations have an obvious downside: they make the job of a particular Infrastructure as Code technology a lot more involved. Technologies which support it need to have a way of determining a given current state of your infrastructure, figuring out the delta to your desired state and the applying the right operations to close that gap. Later in this episode, we will introduce Terraform, which features just this kind of declarative representation.
Idempotence
The second important principle for Infrastructure as Code is idempotence. This means, according to Wikipedia, that a configuration can be applied multiple times without changing the result beyond the initial application. Or, in technical terms, a function or operation is called idempotent if it produces the same result regardless of whether it is applied just once or many times in a row on any input.
In Infrastructure as Code, idempotence generally makes an operator’s life easier, since it enables them to ask the Infrastructure as Code technology for a specific desired state without having to know the intricate details of the current state of an environment. Indeed, Infrastructure as Code technologies which are based on the declarative representation of a desired state are automatically idempotent.
Stretching the definition of idempotence a bit, we usually also mean that when applying a desired state declaration to an environment, infrastructure components which already conform to the desired state are not touched. Again, this makes the lives of operators easier, since they can rest assured that no components will be interrupted unnecessarily due to a change in desired state.
Pets versus Cattle
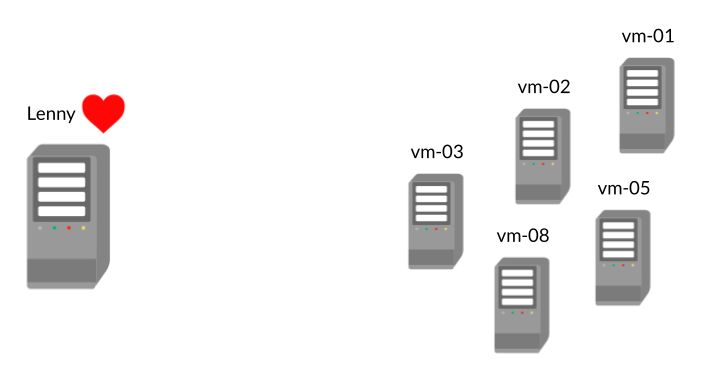
The third important principle of Infrastructure as Code is that all infrastructure is disposable and can be recreated at any time without manual intervention, the admittedly somewhat cruel analogy being, that infrastructure is treated like cattle. Long-living components which are manually maintained and updated by operators would be considered as pets by the same analogy and are not suitable for Infrastructure as Code. Having disposable, fully automated infrastructure has the advantage that we can painlessly try out and change things in our infrastructure without worrying about breaking manually maintained pet components.
So, for example, if you have a server which you have given much love and where you install and configure things manually. Maybe you’ve even given it a name, like Lenny. And if Lenny were to die, you would cry about if him, then you have created a pet. If, on the other hand, you have a herd of servers which serve a purpose but can be recreated any time without manual intervention, then you are dealing with cattle.
Continuous Delivery
The fourth important principle of Infrastructure as Code is that there is a pipeline in place which is capable of continuously propagating the current desired state through to your various environments. This also mandates that automatic tests are performed on infrastructure level. We will see later how such tests are achieved.
Being able to continuously enforce a desired state based on declarative representation of your infrastructure in Git will actually be the topic of the third post of this series, so we won’t go into more detail just yet, but be sure to read that upcoming post!
Tools
Now that we have the theoretical knowledge around Infrastructure as Code, let’s look a bit more into how we can actually apply it and which tools can be helpful to manage your resources in a sane way.
Terraform

First off, there is the open-source tool Terraform, which has become pretty much the de facto standard tool for managing infrastructure in a declarative way. It is an independent tool created by HashiCorp, so it is completely infrastructure provider-agnostic and can work with many resource types. However, that does not mean that you can simply switch back and forth between the providers or prevent lock-in! A VM you have created for AWS cannot just be applied to Azure. This means that you can write Terraform code for any provider and even combine them in a single module, but individual resources are highly specific to that provider and cannot just be switched out because a VM in Azure might require different parameters than one in AWS.
Terraform is very modular, and the individual modules and providers are maintained by a huge and active community. This makes it a tool that is always up-to-date and new features the infrastructure providers introduce are available quickly. The best example is the AWS provider for Terraform, which gets updated multiple times every day and very much keeps up with the fast pace that AWS has when it comes to releasing new features and products while being very stable in terms of not breaking your existing configuration.
For its resource definitions, Terraform uses its own language called HCL or HashiCorp Configuration Language. This means that new users of Terraform have to learn this new language, but once they know it, they can apply it to any infrastructure provider.
AWS Cloud Formation

A second category of tools is the ones maintained and released by the larger infrastructure providers themselves. As an example, we took AWS Cloud Formation, which is Amazon’s IaC tool. However, there are very similar tools for Microsoft Azure (Azure Resource Manager) and Google Cloud Platform (Google Cloud Resource Manager). These tools are always specific to the respective provider and don’t let you combine their resources with ones from other providers. Furthermore, they are usually not maintained by an open-source community, but rather by the providers themselves. Surprisingly, Terraform is mostly more up to date with new features than the tooling the infra providers themselves maintain. Yay, open source!
The advantage of such tools is that they are typically very well integrated with other tooling the provider has. Be it CI/CD servers or a nice GUI to manage one’s declared infrastructure stacks. Furthermore, they are written in a configuration language most engineers are already familiar with like JSON or YAML, which makes them easy to learn. In our experience, though, these tools are usually not as mature, user-friendly and powerful as Terraform.
Pulumi

If you prefer to write actual code instead of just configuration files, Pulumi might fulfill your taste. It supports multiple programming languages like JavaScript, TypeScript, Go, .NET Core and Python and lets you declare your infrastructure as programming code. This may go a little against the declarative approach, but usually the Pulumi library encourages code that looks quite declarative.
The great advantage of Pulumi is that you don’t have to learn a new language because you probably are already familiar with one of the aforementioned ones. You can use all the existing tooling and ecosystem around that language like linting, or even type checking. So, your text editor can help you with autocompletion and tell you if you used a number where you should have used a string. Furthermore, you can use all of your language’s features like loops and if statements to make your infrastructure more intelligent. The downside of this is that you can make the code quite complex and make it hard to test and use.
Terraform
Let’s take a more profound look at Terraform. As mentioned, it has become somewhat of an industry standard because of its intuitive and powerful tooling, versatility and the surrounding ecosystem. So, we want to introduce a couple of building blocks of IaC tools based on it.
Providers
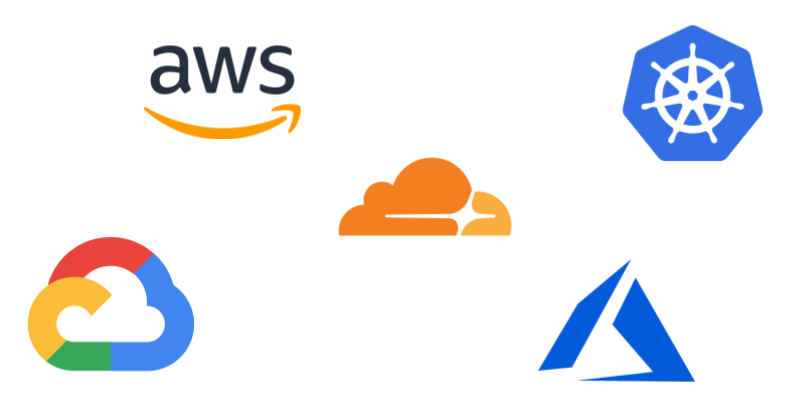
The first concept is what Terraform calls a “Provider”. Since it supports many infrastructure providers and each of them is maintained and managed by its own community, users need to be able to plug different providers into their setup. A typical provider could be AWS, Azure, Cloudflare or even Kubernetes. These contain and abstract the domain-specific knowledge necessary to communicate with the respective infrastructure provider and how to translate different operations on different resources into API calls towards the respective provider. So, for example, the AWS provider contains knowledge about how to provision a VM in AWS, how to configure and change it but also how to delete if the respective resource in Terraform gets deleted.
The modular provider setup is a big part of the success of Terraform, since it makes it an incredibly versatile and powerful tool which can be used by different communities and even combine infrastructure from different providers into one single code base for end users.
As an illustration, here is the provider section from the Terraform module, which we use to deploy our own website.
terraform {
  required_providers {
    aws = {
      source  = "hashicorp/aws"
      version = "~> 3.0"
    }
  }
}

provider "aws" {
  region = "eu-central-1"
}

provider "aws" {
  alias  = "us_east"
  region = "us-east-1"
}
Modules

Another important concept for Terraform are modules. As the name implies, they allow us to modularize our infrastructure and create layers of abstraction. A module is any set of Terraform resource definitions that belong together and are life cycled as one. For a good example, take a look at Lena’s module for creating a single page application on AWS. As this repo shows, modules allow us to make our code reusable. Terraform has a huge registry of such modules for many providers, and it is recommended to use them wherever possible because they help us to write less code, follow best practices and automatically keep up to date with changes from the infrastructure provider.
Another significant part of modules is that they allow us to test parts of our infrastructure. Testing infrastructure, you ask? More about that later.
State

In Terraform, the so-called state describes all the provisioned resources in our infrastructure and how they are configured in a simple and human-readable way. This means that we always have a single file that describes the current state of all of our infrastructure and the configuration of each of its resources’ parameters. When changing something in the declaration of our modules or resources and then applying these changes, Terraform first makes the changes using the respective provider and therefore talking to the infrastructure provider’s API. Afterwards, it updates the state file to reflect the respective changes. Let’s have a look at such a state file:
{
  "version": 4,
  "terraform_version": "1.0.10",
  "serial": 99,
  "lineage": "2c3e0ed3-a77b-46ac-1ae6-ec00c8c0e1e0",
  "outputs": {},
  "resources": [
    {
      "mode": "managed",
      "type": "aws_route53_record",
      "name": "email",
      "provider": "provider[\"registry.terraform.io/hashicorp/aws\"]",
      "instances": [
        {
          "schema_version": 2,
          "attributes": {
            "alias": [],
            "allow_overwrite": null,
            "failover_routing_policy": [],
            "fqdn": "bespinian.io",
            "geolocation_routing_policy": [],
            "health_check_id": "",
            "id": "Z1UVPIZKL5KPK0_bespinian.io_MX",
            "latency_routing_policy": [],
            "multivalue_answer_routing_policy": null,
            "name": "bespinian.io",
            [...]
          },
          [...]
        },
        [...]
      ]
    }
    [...]
}
There are different places where we can store state files. The simplest one, you just saw. The state file can be checked into Git and be versioned with the application. However, this has two downsides: The state file can change after a deployment. So if we do CI/CD and our CD server changes something about the infrastructure, then the state file changes, and we have a dirty repository. The second downside is that it doesn’t really allow for multiple people or systems to apply Terraform configurations because they might have different state files locally, which will eventually lead to problems. Therefore, it is advisable to store the state in a central location like an S3 bucket or even Terraform Cloud. Terraform supports many state backends.
But what happens if people change resources manually without using Terraform, or even if they create resources that are then not managed by Terraform? That is what we call drift. It means that the actual state of the provisioned infrastructure has drifted from the state stored in Terraform. This is a major issue with declarative systems and can only be mitigated by either trusting people not to do so or to preventing it by simply not giving them write permissions in important environments such as production. However, that is not always an option. There is a very useful tool called driftctl which allows us to detect infrastructure drift and tells us which resources are not managed by Terraform or which ones have changed in their configuration state. Let’s see how it works.
Let’s again use the bespinian website as an example, and let’s navigate to the infrastructure folder in that repo. We can now run
driftctl scan
and the driftctl tool will show us all the difference between the resources
present in our AWS account and the resources declared in our Terraform module.
Here is the output we get in this particular case:
Scanned states (1)
Found resources not covered by IaC:
  aws_api_gateway_account:
    - api-gateway-account
  aws_iam_access_key:
    - AKIA33B5E5FBDSBJYYX2
        User: this
    - AKIA33B5E5FBEREZ7WF2
        User: github-action-bespinianio
    - AKIA33B5E5FBKDWXUF3B
        User: lena
  aws_iam_user:
    - gabriel
    - github-action-bespinianio
    - lena
    - this
  aws_route53_record:
    - Z1UVPIZKL5KPK0_blog.bespinian.io_CNAME
        Type: CNAME
Found 17 resource(s)
 - 47% coverage
 - 8 resource(s) managed by terraform
 - 9 resource(s) not managed by Terraform
 - 0 resource(s) found in a Terraform state but missing on the cloud provider
Scan duration: 13s
We can see that driftctl has detected a couple of resources which were created
in AWS without a corresponding resource in the Terraform module. Some of these
are there intentionally, but others will indeed need cleaning up. On the other
hand, all the resources managed by Terraform are in sync, so we are good in that
respect.
A typical workflow
Let’s put our knowledge to work and have a look at a typical workflow using Terraform.
First, we initialize the repo, which tells Terraform to download the respective providers and modules. This is important to have a clean local state and be aware of the current remote state. The “upgrade” flag tells Terraform to look for dependencies that can be upgraded within the allowed limits. For example, we can restrict that providers are not upgraded beyond their major or minor version.
terraform init -upgrade
The second step is to do our actual changes. In this case, we use vim to edit one of the files to maybe add a new resource or change an existing one.
vim main.tf
It can be useful to lint certain configurations in our Terraform definition.
This can prevent application failures from happening in the first place and help
you to follow Terraform and provider best practices. Two of the most popular
linters are firstly tflint which is a general linter for Terraform code and
AWS, Azure and GCP resources. A second very popular linter is called tfsec
which is very much focused on security and preventing security holes in your
infrastructure. It is therefore highly recommended to run these two regularly,
or even make them part of your CI/CD process.
tflint; tfsec
As a next step, we run the command
terraform plan
which does a comparison of the current infrastructure state and what we are applying. It gives us a very nice diff of what would change if the new configuration were to be applied so that we can verify that none of the changes are unintended ones.
As a last step, we finally apply the planned changes by running
terraform apply
This may take a while because it now actually talks to the infrastructure provider’s APIs to provision or change the resources as specified. Afterwards, our state is updated, and the configuration is applied.
Automation
Obviously, it is pretty tedious and inconsistent having to apply all the changes
done to our repo manually. Like any other deployment, we want to automate these
steps and leave them up to a CI/CD server which runs in a consistent environment
and reliably creates consistent deployments. Theoretically, this can be done
with any old CI/CD system where the Terraform binary can be installed because it
just needs to be able to read out our credentials and run terraform apply.
However, there are useful modules for the most common systems which simplify
this process even further. For example, there is a pretty versatile GitHub
Action to use Terraform commands, as can be seen below.
- uses: hashicorp/setup-terraform@v1

- run: terraform init

- run: terraform plan -no-color

- run: terraform apply -auto-approve
Testing

Since infrastructure can be modularized with Terraform, it makes sense to test these individual modules just like we write tests for the individual functions that make up our applications. Firstly, to make sure they actually work. Secondly, to verify that their interface is clean and provides everything one needs to use them properly. One tool to do so in an automated way is Terratest. It allows us to write simple Go code which calls Terraform under the hood. It temporarily creates the infrastructure contained in our module to see if the configuration is valid and then runs a couple of tests on it. As soon as all the tests are through, the infrastructure is automatically deprovisioned and deleted again.
Let’s see how that looks in practice:
func TestTerraformBasicExample(t *testing.T) {
        t.Parallel()

        testID := strings.ToLower(random.UniqueId())
        hostname := "test-" + testID

        terraformOptions := terraform.WithDefaultRetryableErrors(t,
                &terraform.Options{
                        TerraformDir: "../examples/basic",
                        Vars: map[string]interface{}{
                                "hostname":        hostname,
                                "domain":          domain,
                                "resource_suffix": "-" + hostname,
                        },
                        NoColor: true,
                })

        defer terraform.Destroy(t, terraformOptions)

        terraform.InitAndApply(t, terraformOptions)

        fqdn := terraform.Output(t, terraformOptions, "fqdn")

        expectedFQDN := hostname + "." + domain
        if fqdn != expectedFQDN {
                t.Errorf("Expected FQDN to be %s, got %s", expectedFQDN, fqdn)
        }
}
As you can see, tests in Terratest are written in Go. In this example, we first
set some options, then call terraform init and terraform apply. At this
stage, real infrastructure is provisioned, on which we then run our desired
tests. In this case, we check that the FQDN is of a particular form. At the end
of the test we call terraform destroy as you can see by the defer statement
in the Go code.
As you saw, this creates actual resources in your environments, so it’s crucial to wait for the cleanup to happen and to be aware of the costs this can result in. The resources are very short-lived but, nevertheless, they can be costly. Furthermore, sometimes the cleanup can fail. That’s why it’s important to run the aforementioned driftctl from time to time to check for remnant resources that need to be cleaned up manually. Obviously, it’s also very essential not to run these tests in a productive environment because, even though they shouldn’t, they can interfere with existing resources if not programmed well.
All in all, these tests help greatly to have a stable infrastructure and be more confident when releasing new versions of your modules, so we think it’s crucial to have them and maintain them well.
Immutable Infrastructure
Another concept we want to look into today is immutable infrastructure. It is another good practice around Infrastructure as Code, as it simplifies the management of large fleets of VMs and other resources.
The idea
Immutable infrastructure is another good practice around Infrastructure as Code and means that we create infrastructure, for example VMs, that aren’t changed at runtime. If we want to update the base OS of our VMs, we don’t log into each of them and run an update command. Nobody would do that for containers, right? Much rather, we should follow the good practices we have learned from containers and create a new image with the new version of the base OS and recreate all of our VMs in a rolling upgrade with the new image.
Packer

Packer is a tool that greatly simplifies the creation of immutable infrastructure. It allows us to define our VM images, just like we do it with a Dockerfile for container images. So, we have a configuration file which contains a base image and the steps that should be applied to it. Packer then takes these instructions, creates a new image that contains our application and all of its dependencies, and then publishes that image to the infrastructure provider’s image registry. This process allows us to follow all the good practices of shipping images which we are used to from using containers. Like shipping them with all the needed libraries and binaries and not changing them at runtime. But this time we apply them to VM images and treat our VMs kind of like containers in that regard.
Obviously, this has many advantages. It expedites the startup time of our VMs because we don’t need to install hundreds of tools and packages. It makes our images and applications more portable and testable because we can release the same image to AWS, Google Cloud and also to our local VirtualBox. These processes should also further improve the stability of our environments and VMs because no undocumented changes are allowed, and all steps needed to get to our final images are documented in our Packer file. Let’s see how it works.
First, we would specify a Packer template for the image we want to build. Below
you can see an example of an image which will be based ubuntu-xenial-16.04 and
which has NGINX installed in it.
source "amazon-ebs" "ubuntu" {
  ami_name      = "learn-packer-linux-aws"
  instance_type = "t2.micro"
  region        = "us-west-2"
  source_ami_filter {
    filters = {
      name                = "ubuntu/images/*ubuntu-xenial-16.04-amd64-server-*"
      root-device-type    = "ebs"
      virtualization-type = "hvm"
    }
    most_recent = true
    owners      = ["099720109477"]
  }
  ssh_username = "ubuntu"
}

build {
  name    = "learn-packer"
  sources = [
    "source.amazon-ebs.ubuntu"
  ]
  provisioner "shell" {
    inline = [
      "echo Installing NGINX",
      "sudo apt update",
      "sudo apt install -y nginx",
    ]
  }
}
If we now run packer build on this template, an Ubuntu VM will be spun up in
AWS and NGINX will be installed on it. Packer will then trigger the creation of
a snapshot of that VM and create a new image out of that snapshot.
This brings us to the end of the second part of this GitOps blog series. We hope you enjoyed it, and we also hope that you will enjoy the third part, which will be about GitOps itself. Stay tuned for this exciting final part!